
This is an exciting day for me — we finally get to build some ham radio gear! To me, building gear is the big attraction of amateur radio as a hobby. Sure, it’s cool to buy a radio, even a cheap one, and be able to hit a repeater that you think is unreachable. Or on the other end of the money spectrum, using a Yaesu or Kenwood HF rig with a linear amp and big beam antenna to work someone in Antartica must be pretty cool, too. But neither of those feats require much in the way of electronics knowledge or skill, and at the end of the day, that’s why I got into amateur radio in the first place — to learn more about electronics.
To get my homebrewer’s feet wet, I chose perhaps the simplest of ham radio projects: dummy loads. Every ham eventually needs a dummy load, which is basically a circuit that looks like an antenna to a transmitter but dissipates the energy as heat instead of radiating it an appreciable distance. They allow operators to test gear and make adjustments while staying legal on emission. Al Williams covered the basics of dummy loads a few years back in case you need a little more background.
We’ll be building two dummy loads: a lower-power one specifically for my handy talkies (HTs) will be the subject of this article, while a bigger, oil-filled “cantenna” load for use with higher power transmitters will follow. Neither of my designs is original, of course; borrowing circuits from other hams is expected, after all. But I did put my own twist on each, and you should do the same thing. These builds are covered in depth on my Hackaday.io page, but join me below for the gist on a good one: the L’il Dummy.
L’il Dummy
As Al points out in the article linked above, a dummy load is just a resistive element that matches the characteristic impedance of the transmitter’s antenna connection. In almost every case, that’s going to be 50 ohms. The reason that the load needs to be as resistive as possible is that it needs to continue looking like a flat 50-ohm load no matter what frequency is applied to it. Any inductive or capacitive elements in the load will make it more reactive, changing the impedance as the input frequency changes. This could lead to RF power getting reflected back into the final amplifier transistors in the transmitter, possibly damaging them or destroying them altogether. Not what you’re looking for.
That means our resistive elements need to be as non-inductive as possible. But, they also need to be able to dissipate a lot of power. The HT dummy load, which I’ve dubbed L’il Dummy, needs to handle the 5 to perhaps 8 watts an HT can output. Trouble is, power resistors in that range are often wirewound, and a coil of wire will have too much inductance. We’ll need to be clever in sourcing components.
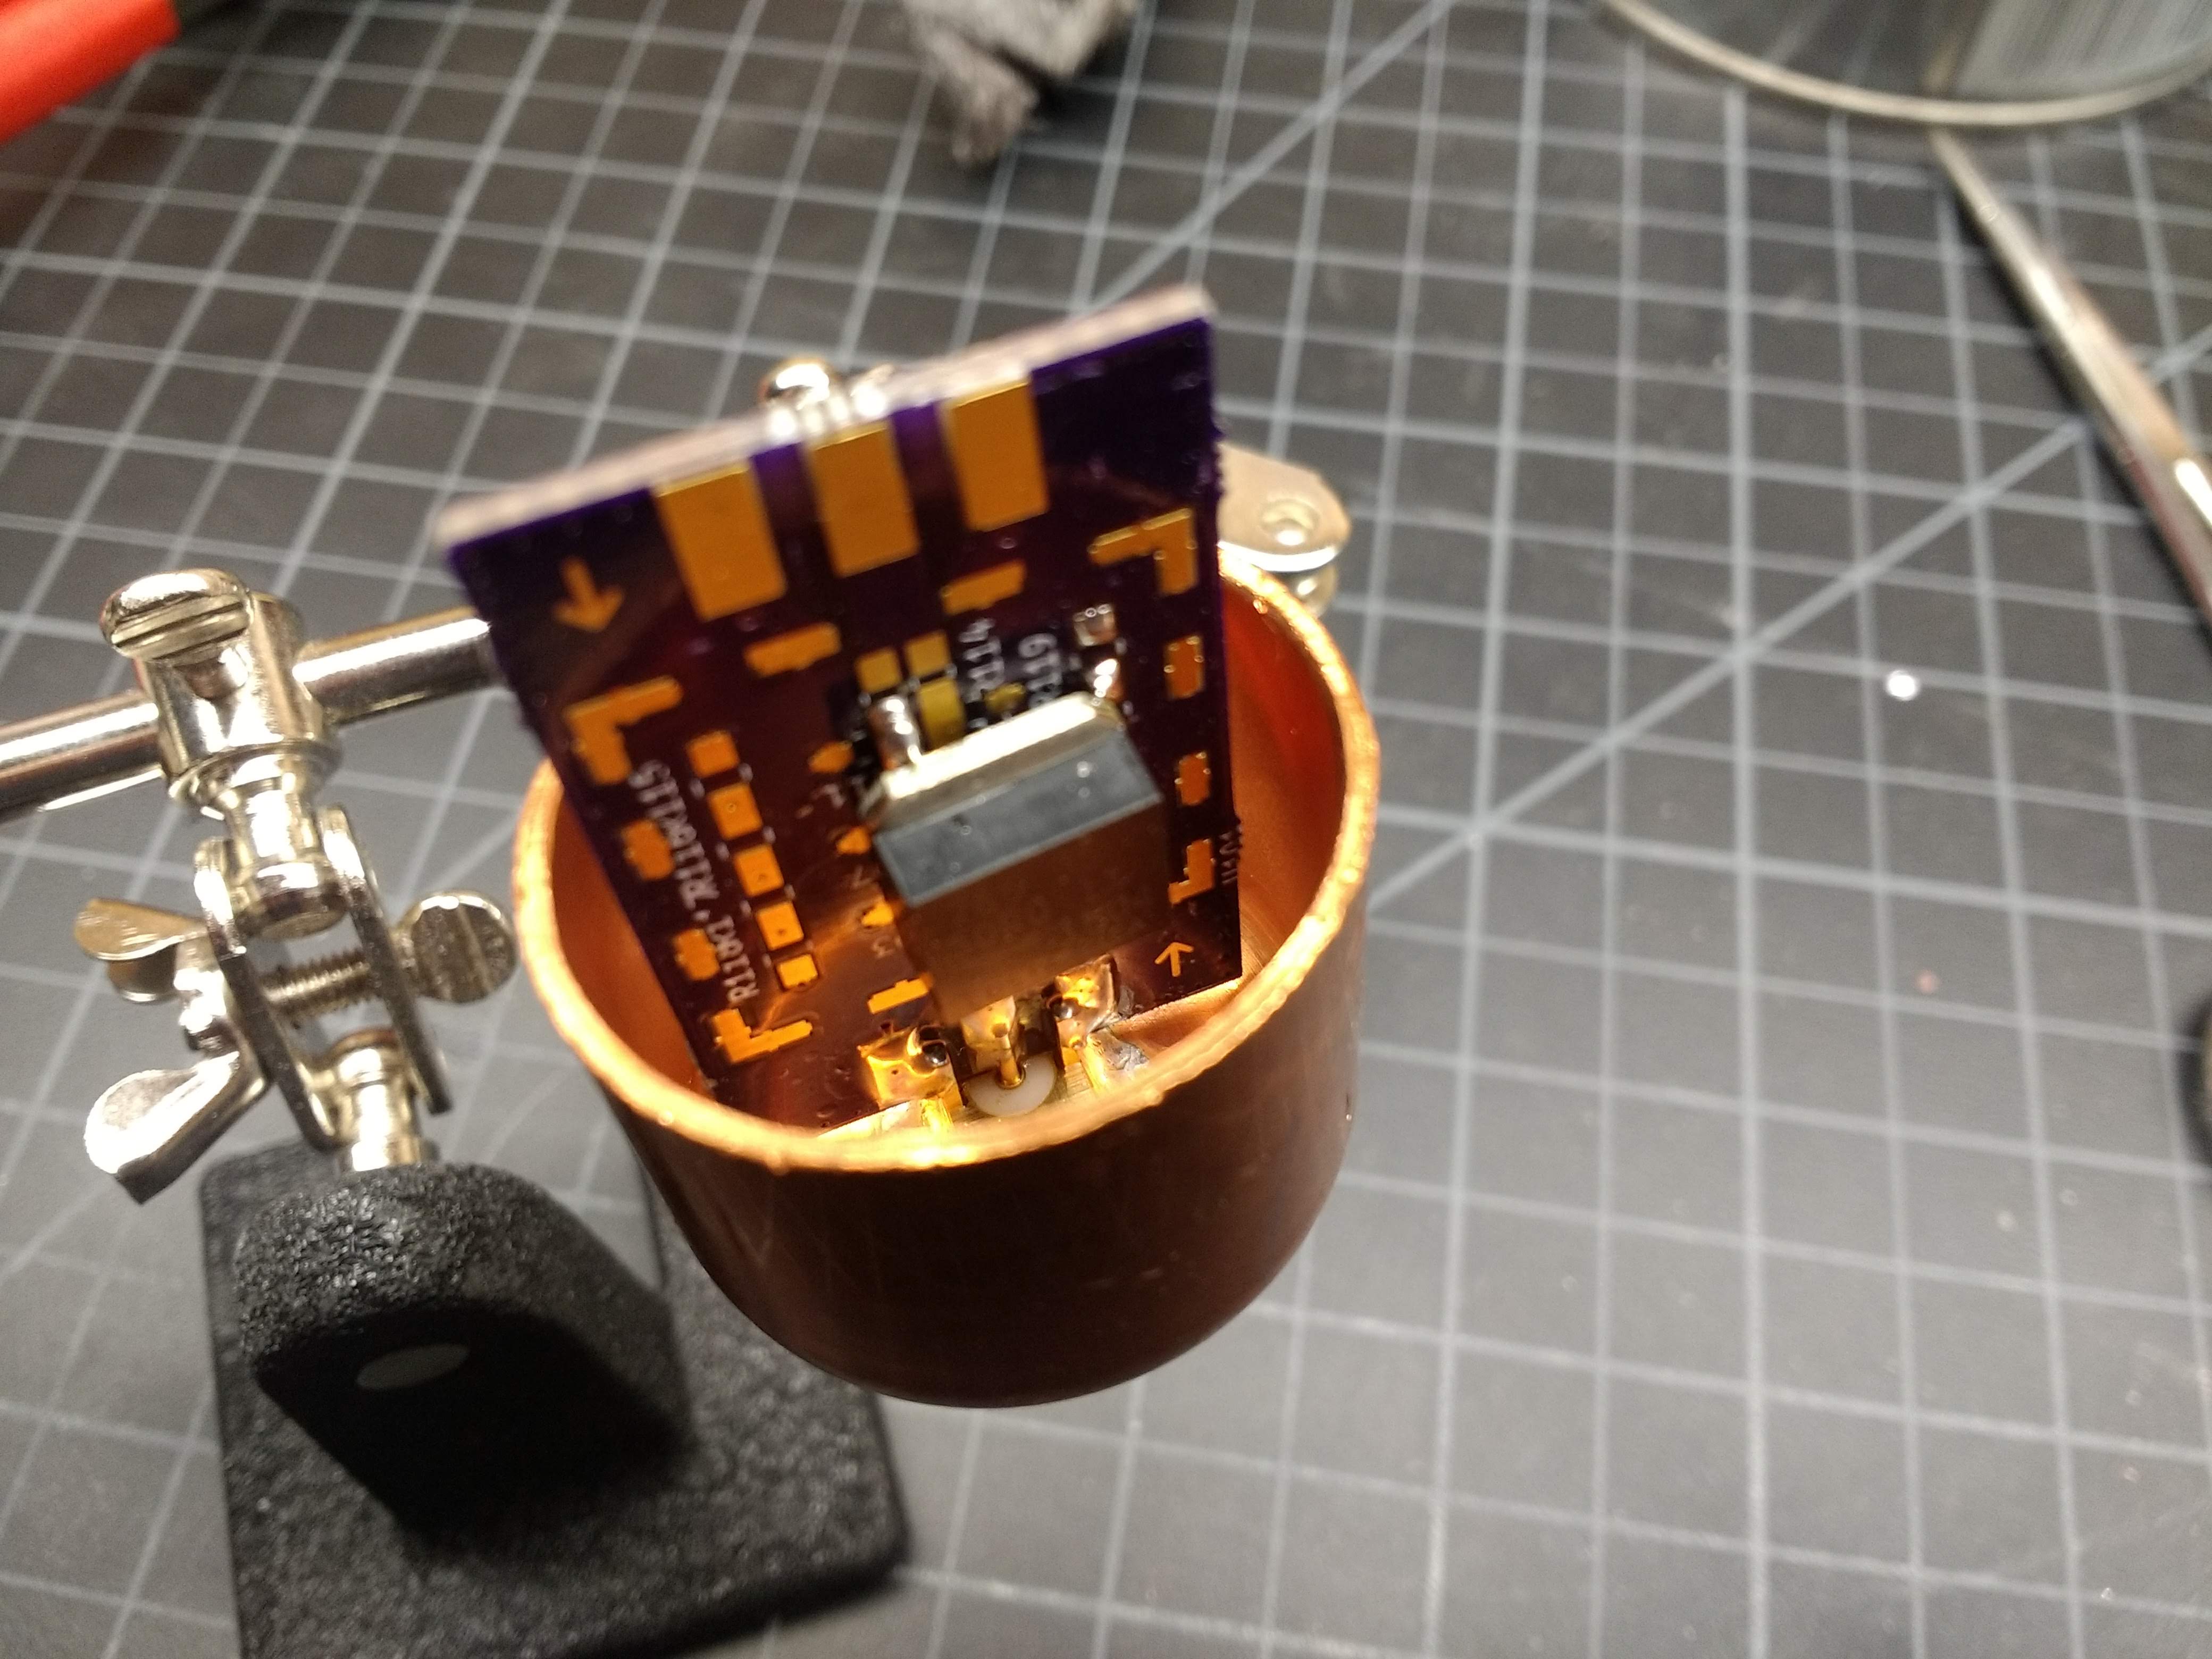
The circuit for L’il Dummy is hardly worth a schematic – it’s just an SMA jack with a 50-ohm resistor across the outer ground and the inner conductor. I chose to build the circuit on an RF Biscuit board. This is an open-source design that enables all kinds of handy little RF circuits — attenuators, filters, and as in this case, dummy loads. The resistive element I chose was a thick-film SMT device capable of dissipating 35 watts – way more than enough for this job. That and an edge-mount SMA jack should have been all I needed to make a working dummy load.
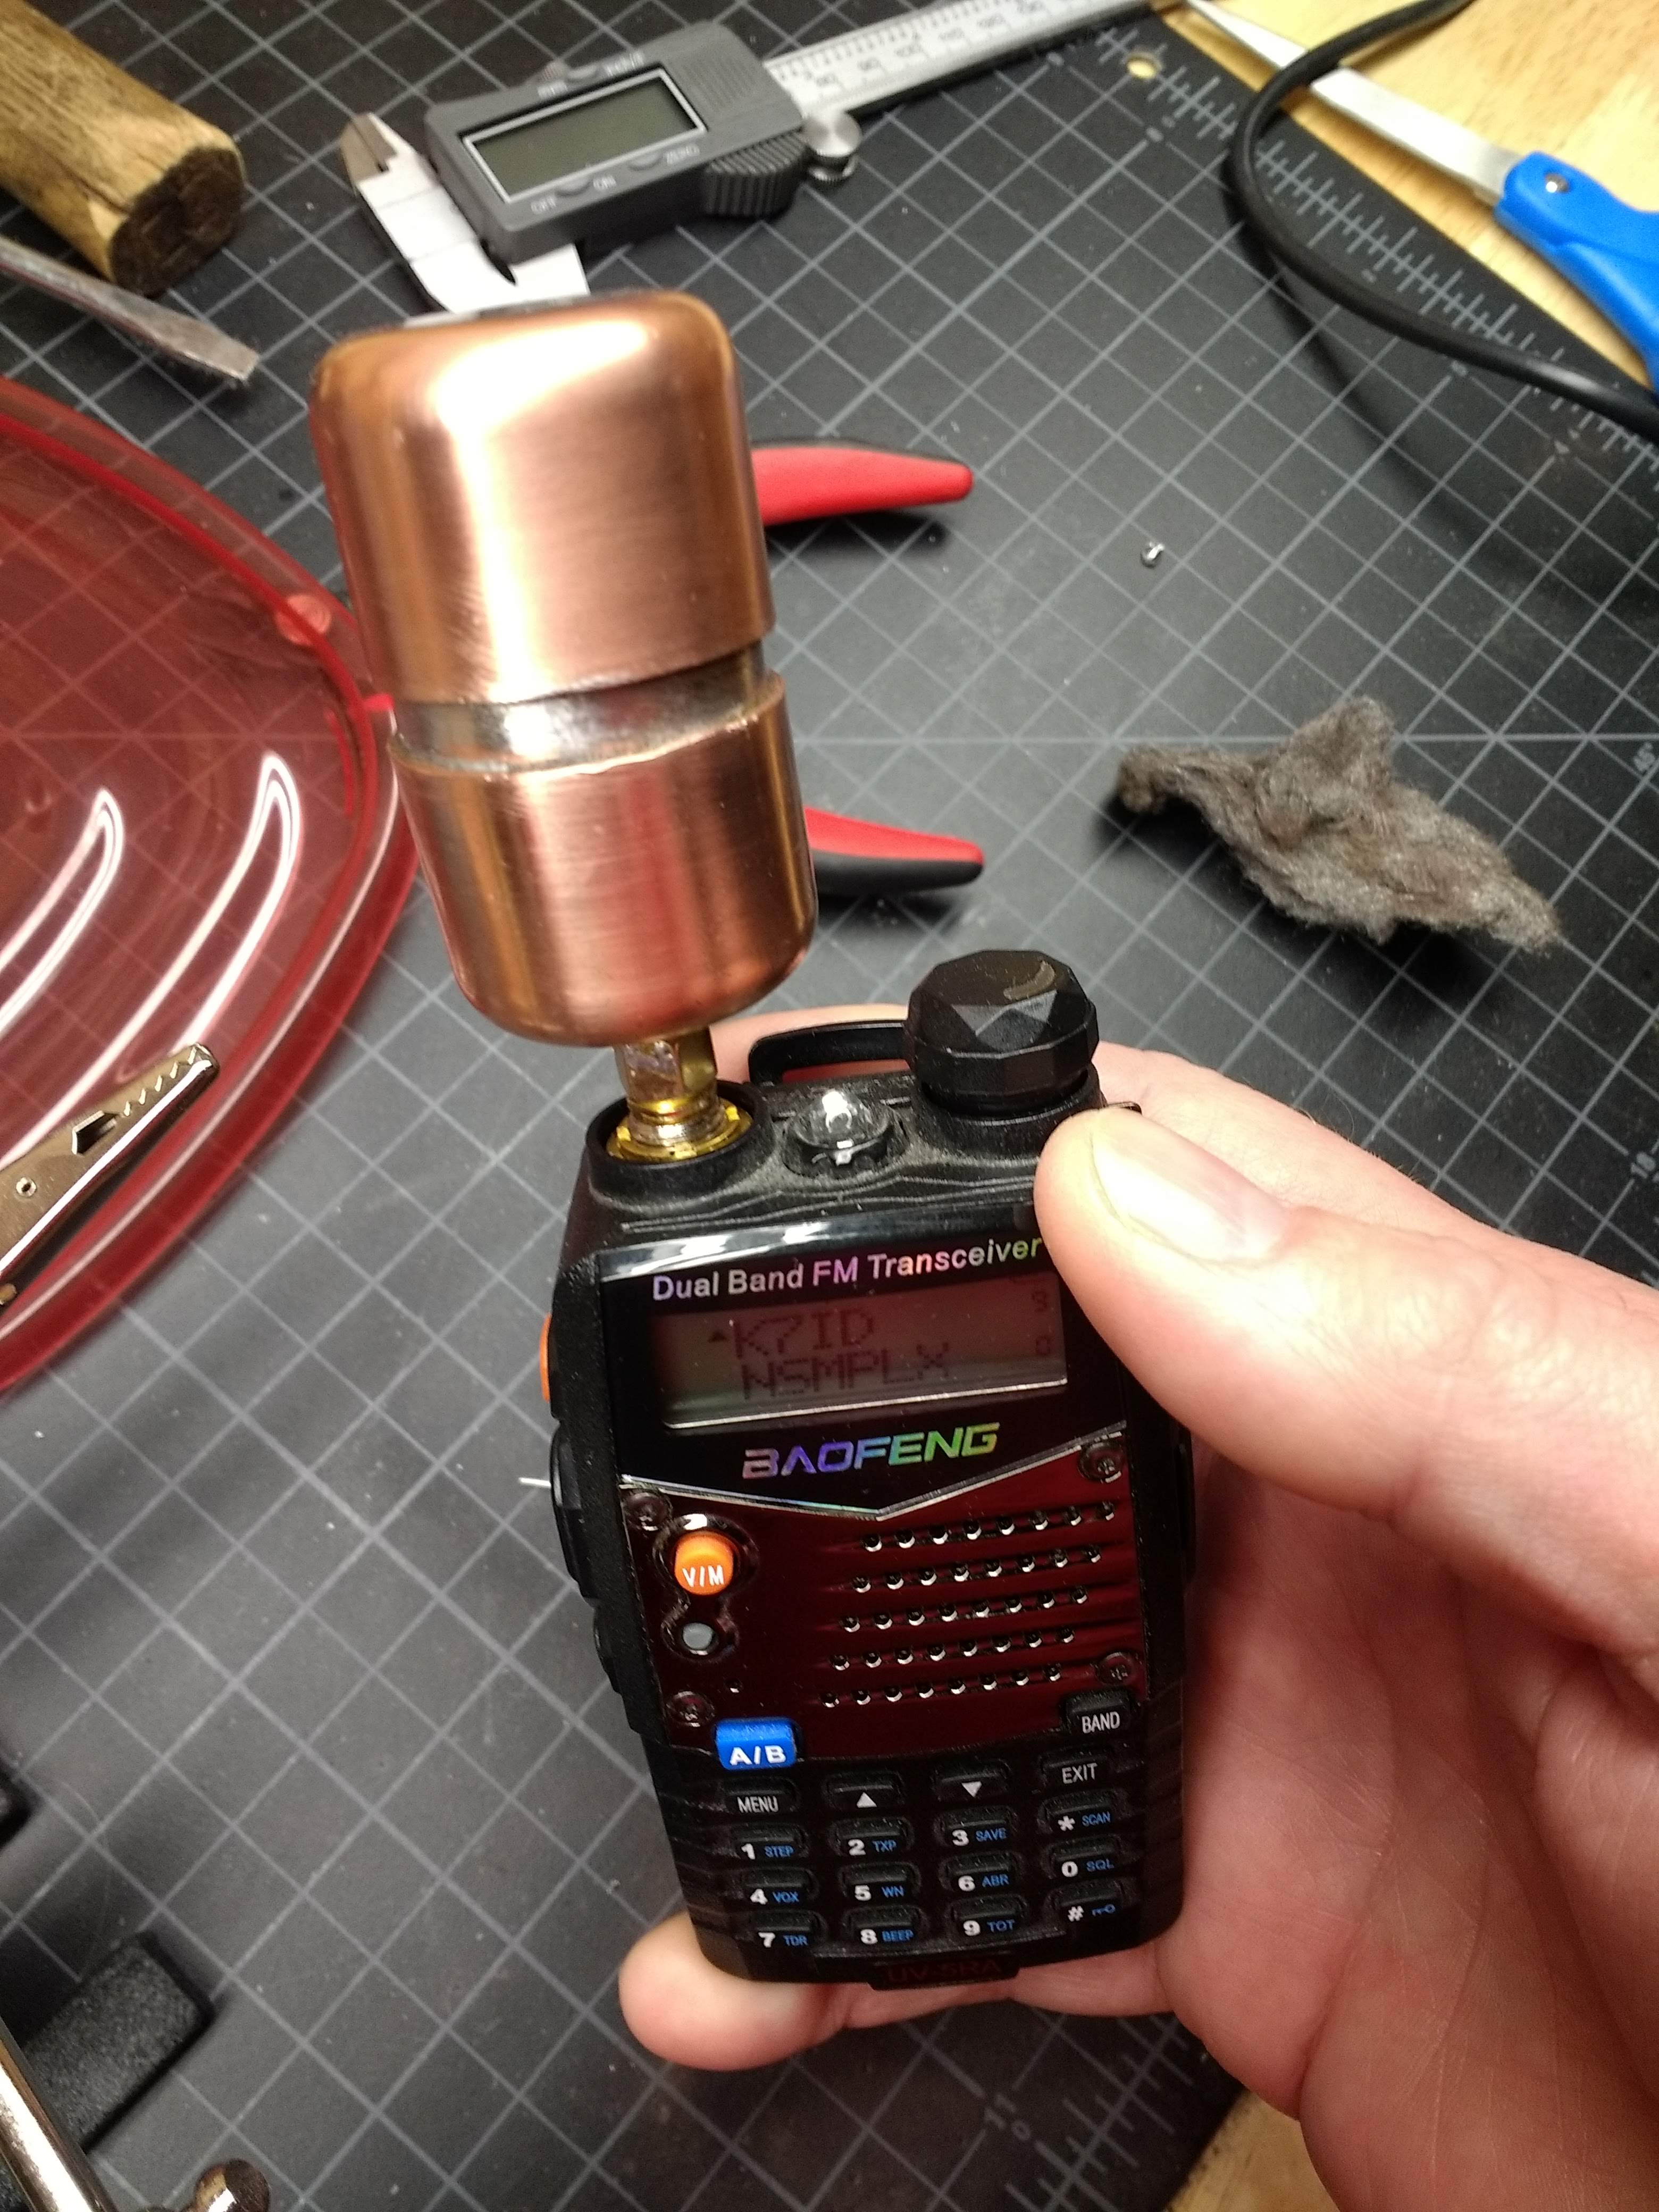
To my surprise, once I soldered the resistor to the RF Biscuit board, the dummy load was almost as good an antenna as the stock rubber ducky on my Baofeng HT. I was able to hit a local repeater through the dummy load without any issues. Clearly not a good design. To correct it, I put the whole thing into an enclosure made from 1″ copper pipe. Not cheap stuff, but not too bad, and I like the look of polished copper. Soldering the whole case together was a challenge that my big Weller soldering gun wasn’t up to, and trying to get everything heated up enough with a propane torch without overdoing the heat was a fun time.
Testing on a Budget
Now for the $50 question: does it work? I tested the resistance with a DMM and it comes out to just about 49 ohms, which is close enough in my book. But that’s DC resistance; what about impedance? I don’t have an antenna analyzer, so I trolled around and found a simple method for measuring impedance with only a function generator and an oscilloscope. My scope has a 20-MHz function generator built in, so I whipped up a quick test jig from a BNC jack and an SMA jack, connected in series through a leftover 1000-ohm resistor.
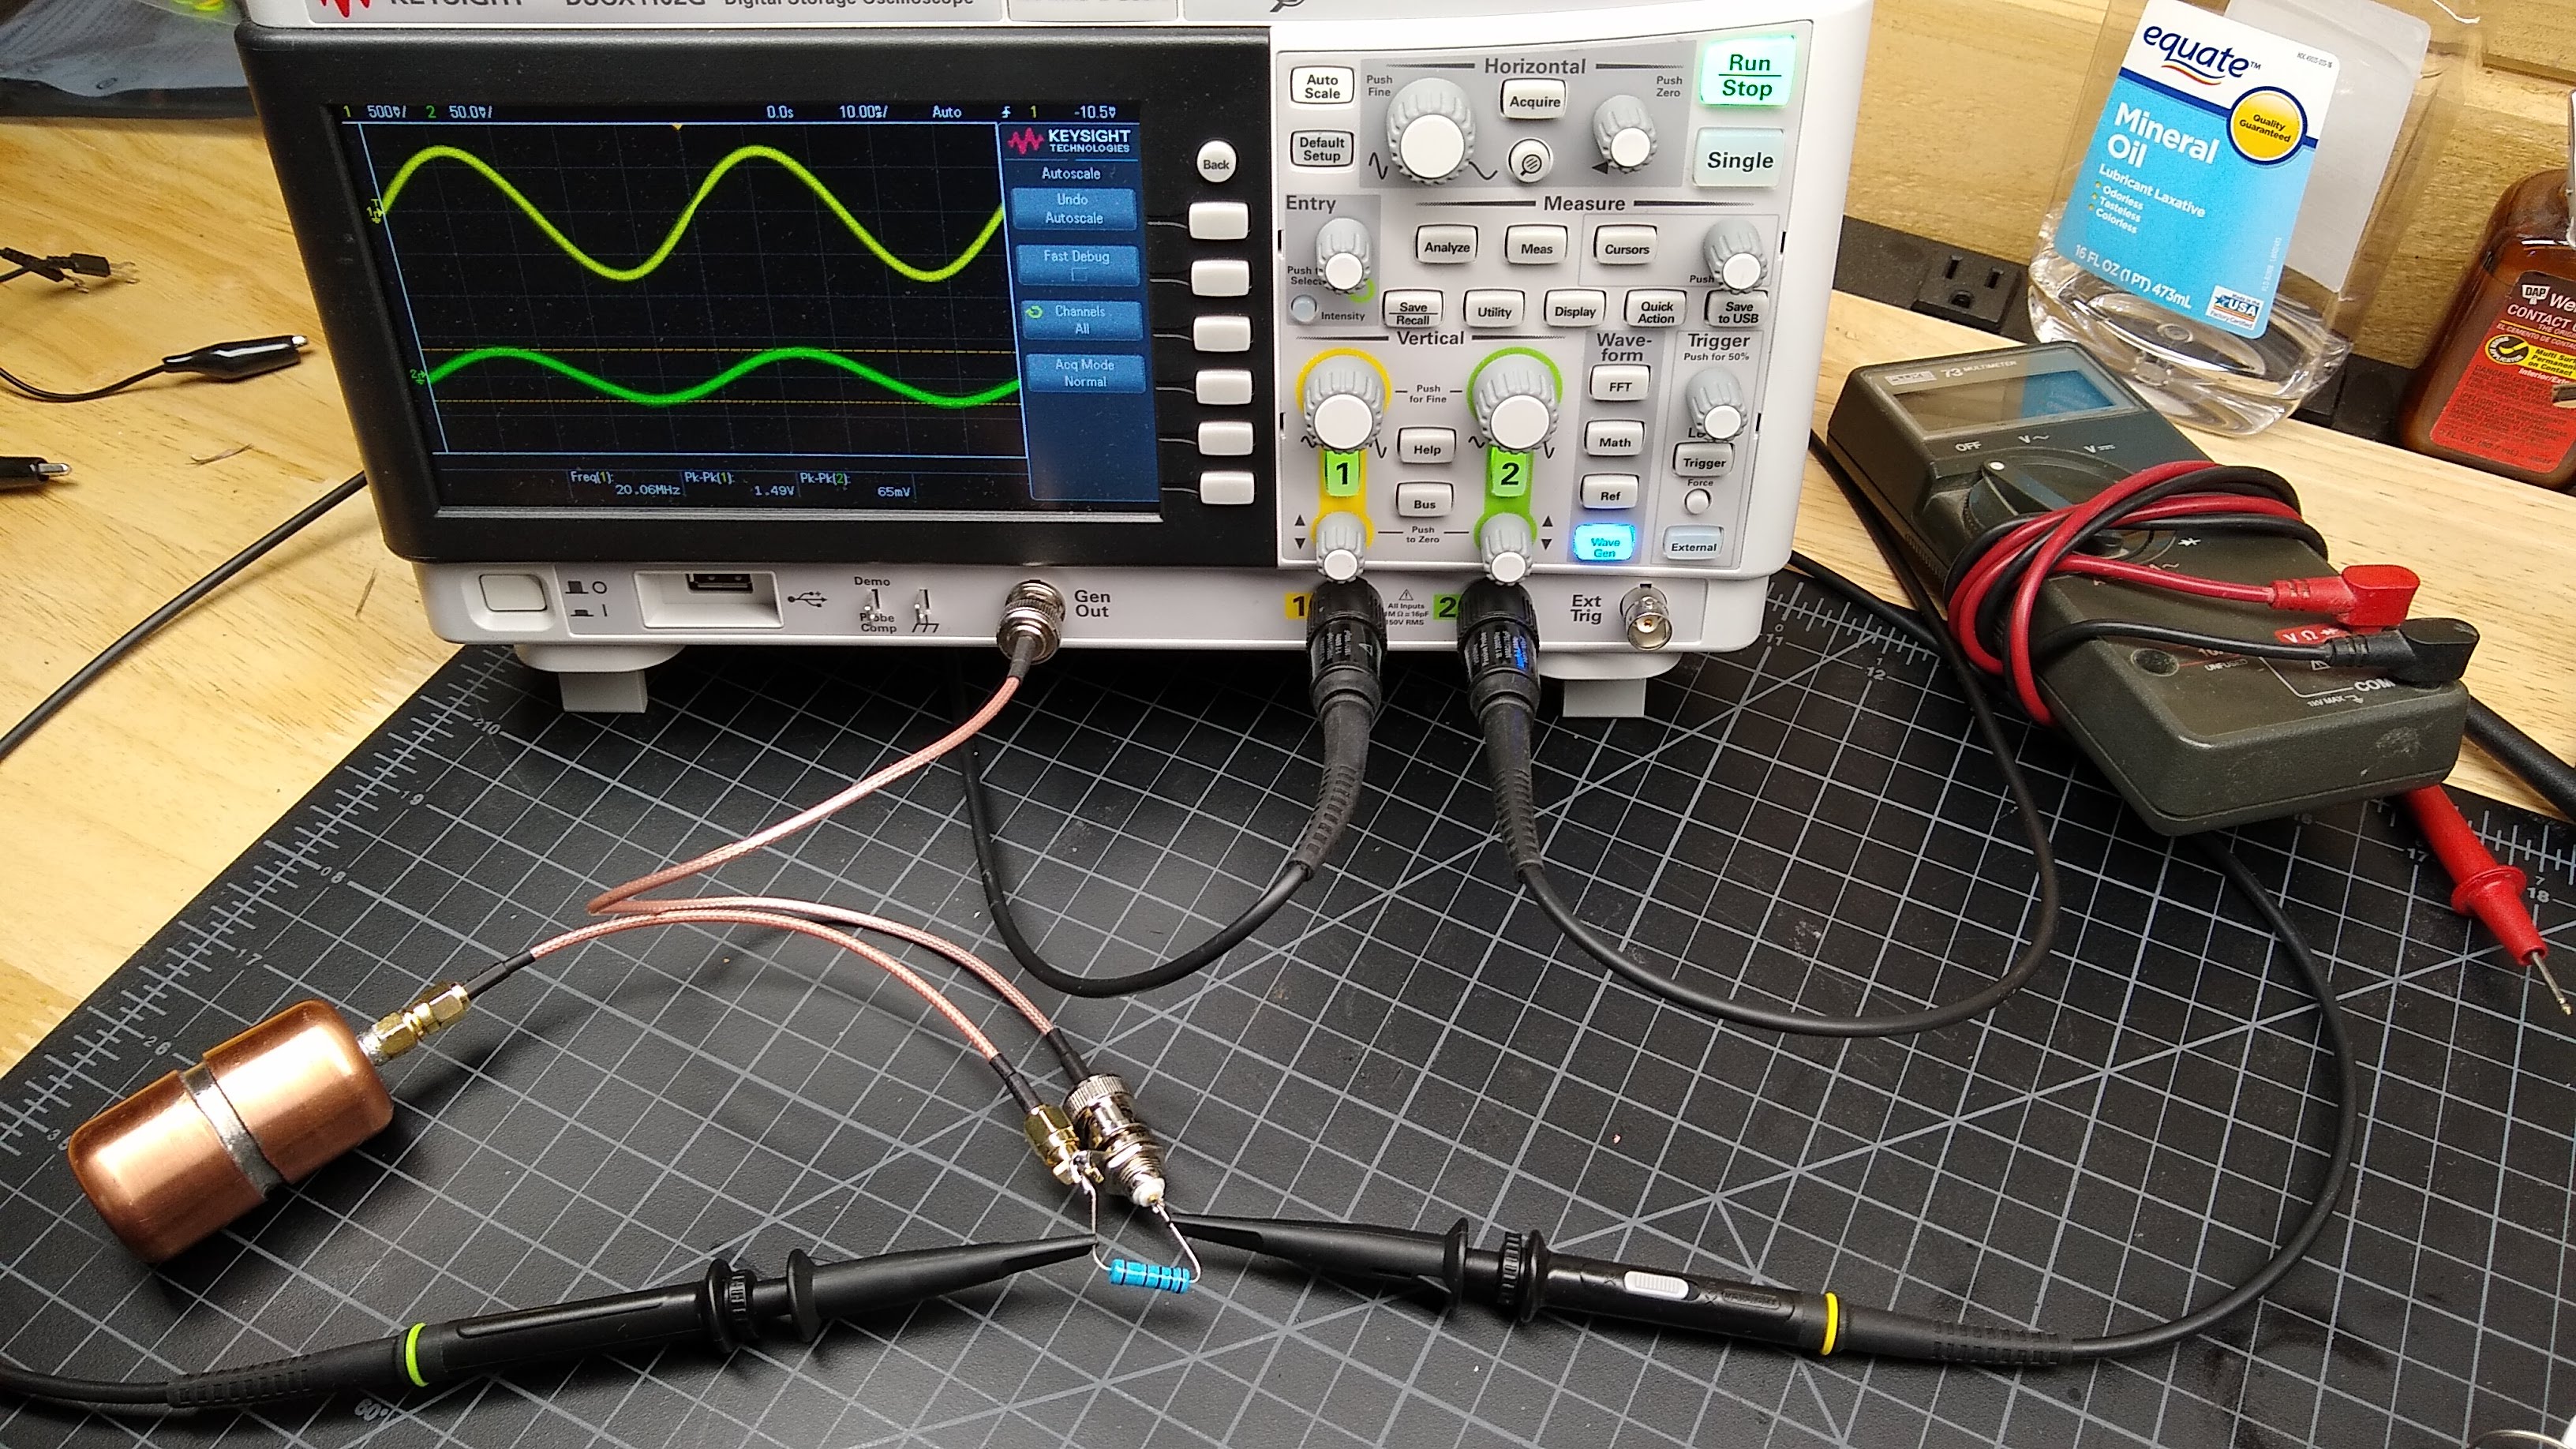
Applying a sine wave into the dummy load, measuring peak-to-peak voltages on each side of the resistance, and doing a little math is all that’s needed to characterize the impedance from 2.5 MHz to 20 MHz. The math is simple:

with V1 being the voltage across the input, V2 being the voltage across the output, and Rref being the actual value of the series resistance, which I measured at 998 Ohms.
And the results are pretty close to 50 Ohms, and flat across the tested band
| f (MHz) | V1 (V p-p) | V2 (V p-p) | Z (ohms) |
|---|---|---|---|
| 20.0 | 1.49 | 0.062 | 43.3 |
| 15.0 | 1.89 | 0.082 | 45.3 |
| 10.0 | 2.57 | 0.113 | 45.9 |
| 5.0 | 3.90 | 0.173 | 46.3 |
| 2.5 | 4.70 | 0.217 | 48.3 |
I wish I could measure it at VHF and UHF frequencies, but that will have to wait until I get a function generator that goes up to 400 MHz or so. I doubt very much that a $50 budget would cover that, though.
Next Time
I had intended to cover both L’il Dummy and its bigger, somewhat smarter brother in one article, but I still have some testing to do on Big Dummy. I’ll cover that next time, and after that we’ll move onto measuring the output of a cheap Chinese HT and perhaps building a filter to clean it up.